plumrose


Monday 25 November 2013

Christmas Window

Can't wait for Christmas
Decorating already?
Let the traditions begin.

 
Brick embossing folder
Window and box die embellished with Copper crackle paint
Bow die
Leave die
 
Challenge: Simon Says : Countdown
Prima: 12 days of Christmas

Merry Christmas Sweet Heart

 
Cricut cut tree coated with Fired Brick Crackle Paint, then dotted with stickles.
I applied the crackle paint in a brush stroke pattern hoping it wouldn't blend as it began to crackle...but it did. So it didn't quit turn out the way I hoped.
Computer generated sentiment and sweetheart background paper.
 
 
Simon Says: Use Heather's Sketch

Here Comes Santa Claus

 
Countdown to the big guy arriving on your door step.....cause really, who believes he really comes down the chimney? LOL.


Brick Stencil background with Festive Berries ink
Outpost stamp painted with Festive Berries and Black ink, Mowed Lawn, tad of paint for his face color.
White paint for his hat trim and beard, applied to give texture to all the fluffiness.
Stickles to put the sparkles in his eyes.
Martha Stewart border Punch for the snowflakes.
 
One month today folks!


Challenge: Simon Says Stamp: Countdown to Christmas

Monday 18 November 2013

Cake or Pie?

 
Cake or Pie? Well....it's in the eye of the beholder!
6 Christmas boxes to decorate your home, one piece at a time.....
and no calories!


Challenge: Simon Says Stamp: Mystery

Friday 15 November 2013

Snowman Happy Holidays


Silent Night Side Step Card


Santa's Helper side step card


Christmas Window

I love the brick embossing folder, but don't love the size of it. IMHO all embossing folders should be the size of a 5x6.5 " that way it can be used easily on other card sizes besides the A2. So for that reason I had to piece this one together with 4 pieces. The ribbon hiding the pieces on the bottom.


So I thought I'd try using the brick stencil and use some modeling paste. It still required me to move the stencil into a second position to cover the card, but I like it! And it was less time consuming.

 
I moved quickly as the paste dries fast, so it was a sort of slap stick kind of application.
Which left some sharp pointy edges. Easily softened out with some gently sanding with a soft sanding paper.
 
I did two different sentiment versions!


Monday 11 November 2013

Mulitiple Layers Step Card


I am so very happy to be Sherri Baldy's guest designer today.
 
The topic this week is Multiple Layers.
 
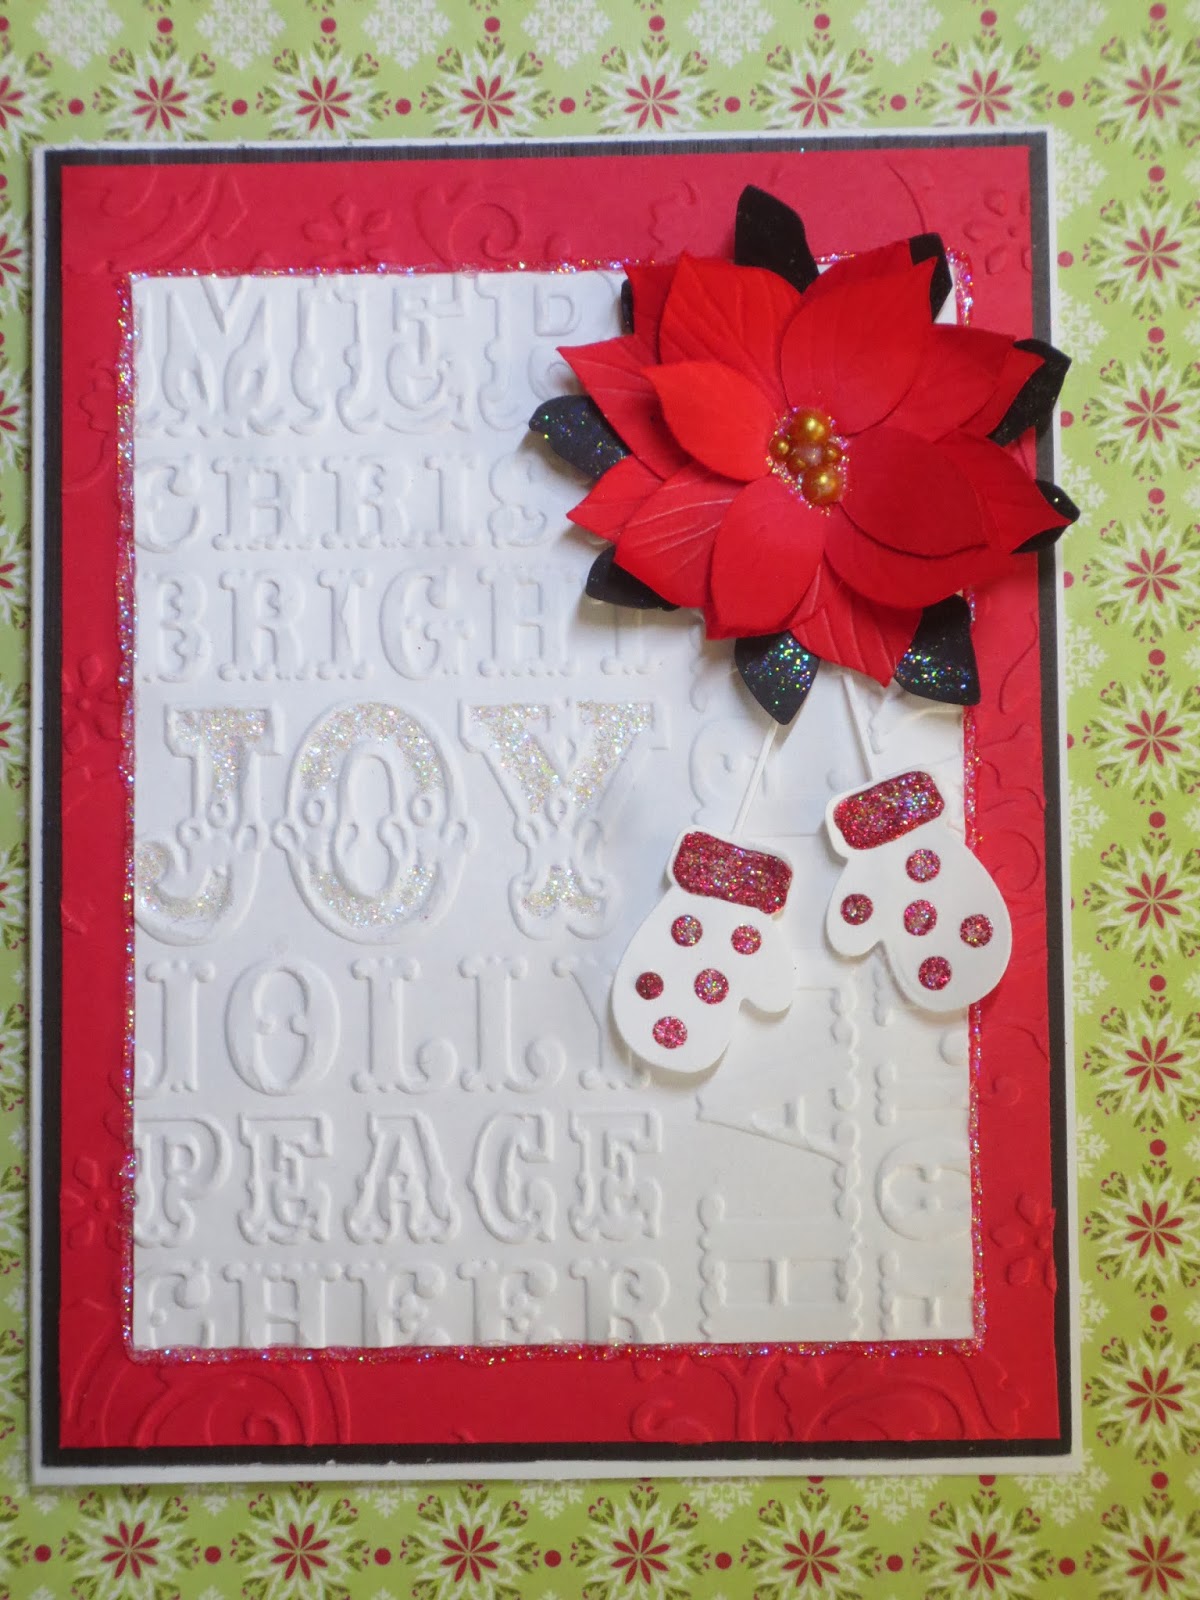
My first layer is a poinsettia colored with copic markers.
I printed off the digi stamp multiple times and colored only what was needed.  (saves on marker ink). The great thing about digi stamps is that you can resize it to fit your project. So for this one, I used 2 different sizes for two different flowers.
The bottom layer was colored completely except for the center. The next layer- just the flower, and the top layer -the flower and the center.
I left a little bit of the white card stock uncolored hoping it looked a little like snow.
Then I cut out all the layers and glued them together to form the complete flower.


The next layer I did was for the background...


Here's my main feature: a digi stamp by Sherri Baldy I just love her line of digi stamps.... and she has a ton of fabulous Christmas ones! xo
 
She's colored with copics as well, with the white fur all glittered up.


So I have layered the flowers and the background paper, and the card too is also layered.
Here's a step card, quite easy to do actually. The challenging part will be to make an envelope for it as it's a 6x6 card. Must check out Michaels maybe.


I printed off a "Here Comes Santa Claus" music sheet from the internet, resized it down and used it in the step part of the card.


Saturday 9 November 2013

Heart Doilie - Dragonfly


Soft colors and a simple lay out made this card so very pretty.
It was made with a heart doilie die, a dragonfly stampe multi colored with stamp markers and embellished with some glossy accents down the center, a script embossing folder for the background, and a computer generated sentiment on vellum


Challenge: Simon Says Stamp- Clean and Simple

Joy- Red White and Black

2 different embossing folders create the background
Glittered up the one word JOY
Memory Box Die - Precious Mittens- embellished with glitter glue
Cricut Cut Poinsettia - embellished with gold pearls


Challenge: Simon Says Stamp - Clean and Simple

Christmas Noel with Reindeer

 
Tim Holtz Sizzix Die - Noel
Tim Holtx Sizzix Die - Reindeer both cut from Designer Paper
Christmas embossing background
Glossy Accents - White for deer's eye


Challenge: Simon Says Stamp: Clean and Simple

Cupcake and Butterflies - Pink

Spellbinders Floral Oval sets off this pretty cupcake candle.
Digi Stamps colored with copics and cut out.
Punched leaves.
Designer paper background.
Viva pen pearl embellishments.
Computer generated sentiment on Vellum
 

Christmas Mittens - mauve


Die punched mittens from Memory Box - Precious Mittens. They are so cute aren't they?
Embellished with some glue glitter
Punched leaves
Heart Doily die using Wax paper.
Falling Snow embossing folder for the background
Distress inks around the edge - Salty Ocean
Rubber Stamp sentiment


Challenge: Simon Says Stamp- Clean and Simple

Tuesday 5 November 2013

Pink Birthday Blessings

Embossed "Poppy" background for the Spellbinders Floral Oval frame
Copic colored digi butterfly stamp
Hand rolled roses from Blitsy (Spellbinders)
And some punched out leavies.
 

Challenge: Simon Says Stamp - Anything Goes