plumrose


Saturday, 5 May 2012

Wedding Book Card Misty Green and Yellow

I'm so thankful for Simon Says Stamp for putting my order to the top of the pile for mailing out my order pronto. Once my new Spellbinders Floral Oval die was in stock, it was delivered in plenty of time to complete this wedding card and got to BC before the wedding. What a beautiful die. (why did they ever name these things "die" anyways ???? Doesn't make for good sentence meanings! Especially if you use it like I just did or...Tim Holtz dies, or Caged  Bird dies. If you weren't familiar with the product line, you'd read it and your heart would skip a beat!)

Anyways.....this one is already one of my very fav. dies. I'll be using it alot. (see next 2 posts as well) Along with that, I've hand made, inked and shimmered misted each rose. Each with a pearl in the center. Punched out some leafs. Cricut cut some swirlies. Added half pearls here and there. And used a wedding cake charm. The greens and yellows are the wedding colors.

Blessing to the Bride and Groom....hope today was all you planned for!


Constructed to look like a Bible


This one was about 10" by 8.5" so I had to construct a box for it. I used a heavy duty
designer paper and then stamped and embellished that with some Perfect Pearls to make it shine!


Challenge: Simon Says Stamp: Happy 3rd Birthday

Wedding Book Card Black and White

This was my first attempt at a book card. It has lots of designer paper and sheet of vellum, heat embossing of the edges, tissue flowers die cut with Tim Holtz Florals, lots of pearls, and a wedding cake charm. The verse is computer generated. The colors are that of the wedding. I hope they had a great day today.


Next time I'll pay closer attention to how the font style can alter the look of a letter....in this case the V looks like a D. But otherwise a very pretty font.


I constructed a box envolope for the card.


A place on the back of the card to write the givers own sentiments. I used photo corners so that the paper within could be replaced if there was a mistake made on it.


Challenge: Simon Says Stamp: Happy 3rd Birthday

Friday, 4 May 2012

Floral Ovals and Hand Painted Roses

My latest toy is from Spellbinders...just love this one. It's soooo pretty. This card was custom ordered to have handpainted flowers and glitter...with a blue theme. Also used here is the Swiss Dot embossing folder and a computer generated sentiment onto vellum.

Another card/project coming using the Floral Orals tomorrow. Today is the wedding, so I will post it after the vows have been taken!


Challenges: Simon Says Stamp---  Birthday

Tuesday, 1 May 2012

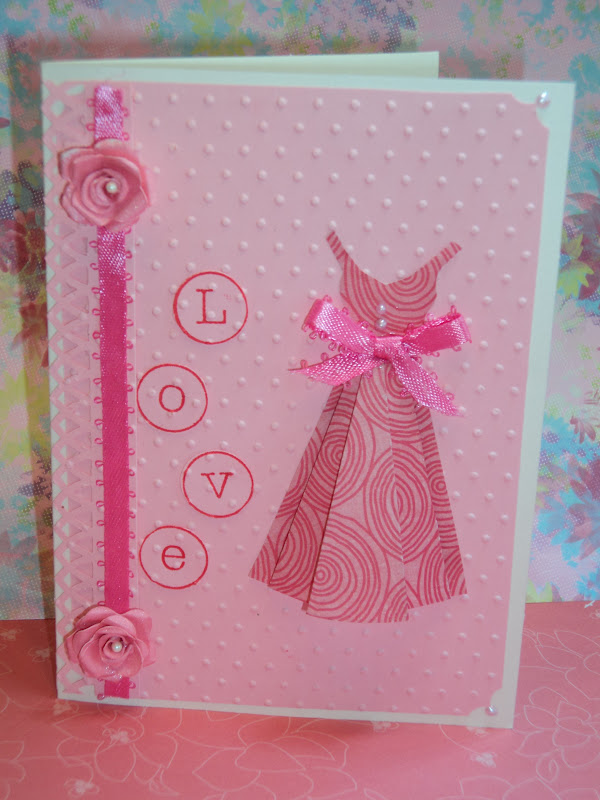
Paper Dress

I found this cute little template to make a paper dress. The link I had saved to it has been removed so I can't share it with you anymore :(

Also used is a Martha Steward punch for the boarder. Swiss dots embossing folder and a stamp for the sentiment, cut around each letter and placed unevenly.

A little bit of Viva Pen, Lilac, for the dress bottons and embellishments.

Oh, and a couple handmade roses.


Update: I found the link:


Challenge: Simon Says Stamp

Spellbinders Fleur Di Lis

Another spellbinders Fleur Di Lis die used here, with a few glittered handmade roses. I think this is going to be one of my all time favourite dies. The Wedding Wishes sentiment is computer generated and printed onto vellum.


Challenge: Simon Says Stamp

Monday, 30 April 2012

Fleur De Lis and hand made Roses

One of my new favourite toys: Spellbinders Nestabilites Fleur De Lis Squares. Combined with some hand made Roses and a ribbon...not much more is needed! Simple and elegant.


Challenge: Simon Says Stamp


Coffee Filter Roses

Well, my computer has been fully debugged and I'm ready to go here. While it was on the blink I got busy making some coffee filter roses. I was amazed at how they turned out. Fairly easy to do too. Just need some Rose perfume and little more rolling of the petals, and they'll be complete.

I used the flat coffee filters, watered down folk art acrylic paints, green wire, and the green floral tape, a paint brush to kiss the edges with some more paint, a sishkabob stick and scissors of course.....and a blow dryer at the end.

I first saw the roses on Pinterest and had to give it a try. Here's a link for written instructions, but I also watched a video on youtube ....much easier to see it being done. But it is a 52 minute video.


Sunday, 15 April 2012

t!m techniques's

This truly isn't  t!m's style but all are his techniques.
Incorporated in this one card I've used his Pumice Stone Ink to edge around the card and oval frame. I've watermarked in Champagne his stamp "Enjoy the Journey" all over the card. Stamped on grunge paper, then trimmed around the jalopy, and stickled in the windows. In the corners is his stamp from the Enjoy the Journey, and then highlighted both the watermarks and the corner stamps with Perfect Pearls. The flower is die cut from his Tathered Florals, and inked a bit with some Gold metallic Alcohol Inks and swiped thru a bit of the perfect pearls that I had spilled onto the mat, so I added a bit of water and dragged the tips of the flower thru it....can't waste it after all, right?


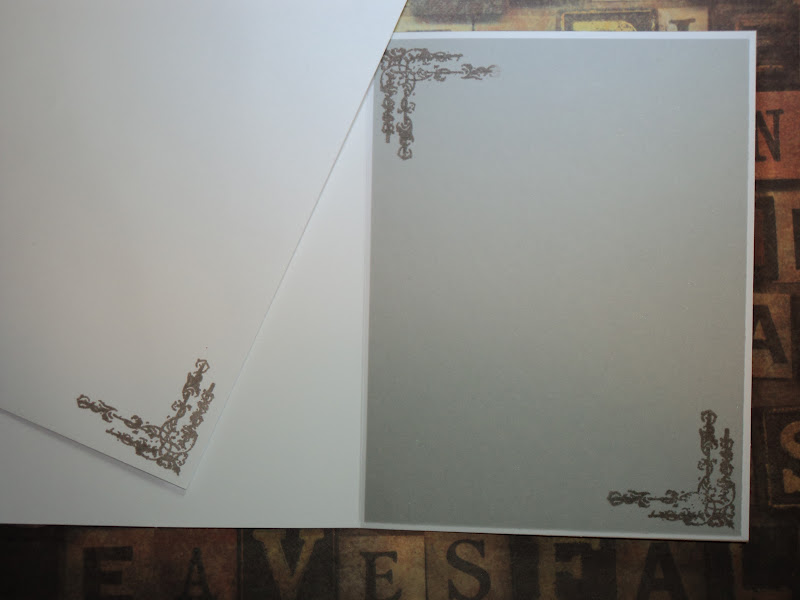
I always like to do something with the inside of the card, usually a matching stamp, this time I went a little extra with the grey cardstock too, and on the envolope as well.


Just adding a little t!m humour too!


Challenge: Simon Says Stamp - t!m techniques


Monday, 9 April 2012

Hinged photo frame

Well.... it will be hinged after I get one.


I saw this on someones blog, who I'm trying to find again. I thought I saved it in my files, but it has gone aluf. I'll update when I find it.

 I loved it so much I wanted to make one exactly like it, the colors, the materials, everything. I even went down to my Mom's house and stole some chicken wire.


But as it turns out, it's all my own. I didn't like the chicken wire and stuck with green and white colors, with a hint of yellow.

Everything was cut out with my cuttlebug, lots of Tim Holtz products, a cricut cut for the big flourish, inks and a little glitter glue for the flower centers.


It's built with congregated cardboard, from a scrap box I picked up from Toy'sRUs.  3 layers on each side.


I left the layer between the background and the next layer free from glue, just at the bottom,  to accommodate a photo to slip up thru.  But all the rest was glued with Aleene's white glue.


I wanted to toughen up the delicate flourishes, butterfly, and the green base to the flowers somewhat, so I mod podge everything.


Saturday, 7 April 2012

3 in 90

I got a little caught off guard this weekend and needed 3 cards in a hurry. So rather than being meticulous about paper, and inks, and embellishments, and die cuts and pearls etc etc, I decided to challenge myself and see how fast I can make 3 cards, and not think too much about what I wanted to do.

So I got out my good old Cuttlebug, my Tim Holtz Mini baroque die and quickly chose some designer paper, with some flowers from my stash, and made all 3 with the same basic elements.

Here's my 3 cards in 90 minutes:


Friday, 6 April 2012

Painted Vases

Trees are juuuust starting to bud around here. Love the awakening of springtime.  So I'm back to painting a few things on some glassware this week.
Hand painted with Folk Art Enamels, I painted Blossom's and Fuchsia's.

Happy Easter!


Sunday, 1 April 2012

Altered: From book to rolodex


This old book was from the 1950's. A Popular Mechanics- Do It Yourself  encyclopedia.
Fitting that I fixed it up myself don't ya think?


First thing I wanted to do was coat the book covers with Mod Podge. Just so that it was be protected if ever placed in coffee spill or something. And to preserve the book a bit. I also Mod Podged the inside covers.


Then it's simply folding in every page, in towards the bind of the book. I inked the edges just a bit with greens, a dash of red, and vintage photo....to match the book covers.  The black you see are photos originally in the book.

The finished product!


A little play on words here. Dad's initials are DG. Add an O and you get Dog....he's bestest!
The brad is an old fashioned camera...another hobby of Dads....photography.
I'm not sure what kind of car Dad had when he was married, there's a photo of it somewhere, but the color of this car brad is close to what make it was...well according to my knowledge of cars anyways :)
Based onto a Tim Holtz die edge cut, on grunge paper covered with design paper.


Dad always liked pocket watches....this one was heat embossed gold. I had no idea what time he was born, so I couldn't place the hands accordingly. Now I know it was around 9pm.....little off in my guessing! I didn't think they would know themselves, but they did.  Oh well.  'ThingsToDo' was cut with my Cricut, using grunge paper and design paper. Embellished with a Tie Brad.


Pennies here in Canada are now being dumped by the government. So I thought it would be kinda neat to find a penny for every decade of his life. Now that they were still in circulation. I managed to find all but two in the year of 01's. Amazingly enough I found one in the exact year he was born, 1941. I couldn't find a 1951 or a 1961, but all the rest I found. For the year 2012 I just added one of the special bicentennial pennies.


Dad is now retired, no longer with his nose to the grind stone. But he put in a good many years providing for his family. So the Tim Holtz Die gears and spinner represent his years of hard work, and as the spinner actually spins here, time still ticks as he still gives a lot of himself and time to his community and his family.


Made with different pieces of grunge paper, pop cans, 1/4"washer, and a spinner, and the "gears" embossing folder.


Happy Birthday Dad.

Challenges: Simon Says Stamp - anything goes
                         Craft Us Crazy - anything but a card
                           Always Crafting - anything but a card